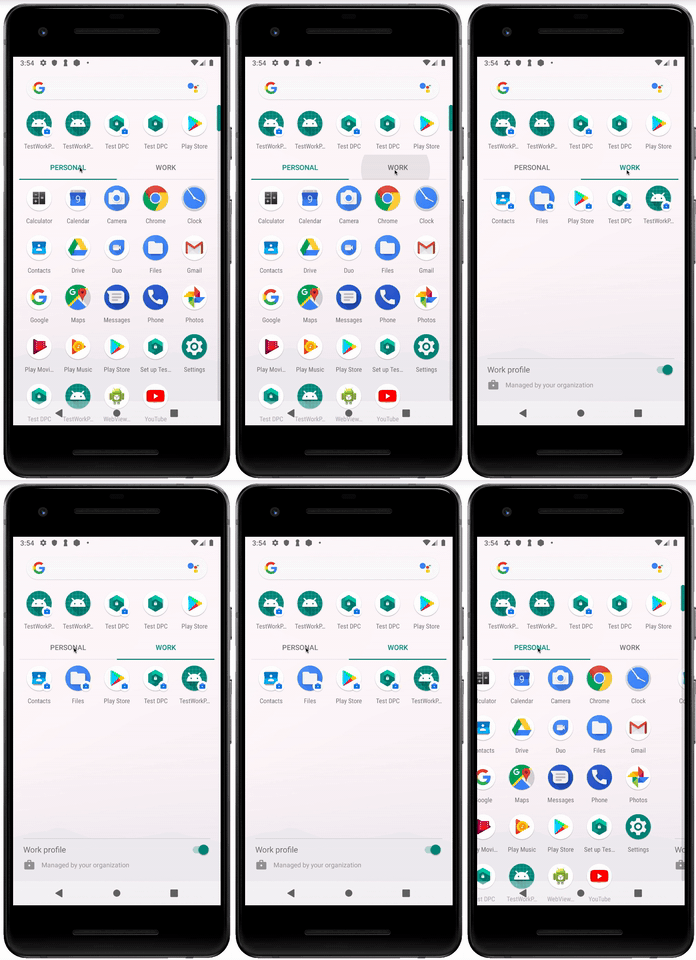
This section shows you how to create a cross-profile hello world call within your app. This will give you familiarity with the SDK and an initial implementation to build on top of. You are recommended to actively follow along by developing in your app.
Set up a test device with a work profile
Google builds the Test DPC app to help you simulate and test a managed environment on your own device. It will set up a work profile and provide you with controls to enable or disable certain features on the device.
Install the Test DPC app
Open the Google Play Store and download the Test DPC app.
Set up a work profile
One the app is installed, you should see two icons appear on the device, a setup icon and the Test DPC app icon. Tap the setup icon and follow the steps.
Now you have two separate profiles, one for personal apps and one for work apps. You can switch between them through the tabs at the top of the app list.

When installing your app, it will normally automatically install in both
profiles. If you ever need to install it explicitly into the work profile, you
can use the --user argument with adb install.
$ adb install --user [id number of profile] [path of apk file]
For more details about setting up a test device, visit this link.
Ensure your application is configured appropriately
Enable java 8 support and ensure your minSdk is at least 19.
Add gradle dependencies
dependencies {
  annotationProcessor
'com.google.android.enterprise.connectedapps:connectedapps-processor:1.1.2'
  implementation
'com.google.android.enterprise.connectedapps:connectedapps:1.1.2'
  implementation
'com.google.android.enterprise.connectedapps:connectedapps-annotations:1.1.2'
}
We use Guava in this example. This is not a requirement of using the SDK, but to
follow along with the hello world you should also add
api("com.google.guava:guava:29.0-android").
Create a new class that will contain your test cross-profile call
To make this more useful later, you should put it in the same package that you would like your real cross-profile calls to go in.
public class HelloWorld {

  @CrossProfile
  public ListenableFuture<String> helloWorld() {
    return Futures.immediateFuture("Hello world");
  }
}
If you can't depend on Guava for Futures support, just follow along for now and then see the final step which tells you which changes to make.
Make a cross-profile call
You could do this in a class that will need to make real cross-profile calls later.
// TODO: inject/pass these into the class later instead.
CrossProfileConnector crossProfileConnector =
  CrossProfileConnector.builder(this).build();
ProfileHelloWorld profileHelloWorld =
  ProfileHelloWorld.create(crossProfileConnector);

ListenableFuture<Map<Profile, String>> resultsFuture =
  profileHelloWorld.both().helloWorld();

FluentFuture.from(resultsFuture)
  .addCallback(new FutureCallback<Map<Profile, String>>() {
    @Override
    public void onSuccess(Map<Profile, String> results) {
      for (Profile profile : results.keySet()) {
        Log.w("tag", "CROSS_PROFILE profile: " + profile.asInt()
          +   "; result: " + results.get(profile));
      }
    }
    @Override
    public void onFailure(Throwable t) {
      Log.e(TAG, "Failed to say hello world on both profiles", t);
    }
  }, directExecutor());
Provide the instance to the SDK
Of course, the helloWorld method call mentioned earlier is on a generated
class and not the real one. Often, your real classes are singletons or other
complex classes dependent on dependency injection frameworks such as Dagger. To
allow the logic to be called on the real class on the other profile, each custom
@CrossProfile class must have a corresponding provider method in a
@CrossProfileProvider class. Create this class.
public class HelloWorldProvider {

  @CrossProfileProvider
  public HelloWorld getHelloWorld() {
    return new HelloWorld();
  }
}
Additional wiring
The code generation required to support custom classes and methods requires a small amount of additional wiring. This is to handle the complexities of having many build targets and visibility requirements at scale.
Firstly, annotate an existing or new high-level class with
@CrossProfileConfiguration, pointing to your provider classes.
@CrossProfileConfiguration(providers = HelloWorldProvider.class)
abstract class HelloWorldConfiguration {}
Secondly, add the automatically-generated service to your manifest, inside the
<application> tag. This may not resolve until you build your project.
<service
android:name="com.google.android.enterprise.connectedapps.CrossProfileConnector_Service"
android:exported="false"/>
Finally, for development purposes, give yourself the INTERACT_ACROSS_USERS
permission. If you don't have it already, you won't be able to keep this in
production, but it's the easiest way to get started. Firstly, add it to your
manifest as follows:
<uses-permission
      android:name="android.permission.INTERACT_ACROSS_USERS"
      tools:ignore="ProtectedPermissions"/>
Then, you can grant yourself the permission from the command line with adb as follows (if your app does not already have it):
adb shell pm grant <your package> android.permission.INTERACT_ACROSS_USERS
If you were not able to depend on Guava for Futures, you will need to make a few changes. Firstly, return the "Hello World" string directly and print the results of the cross-profile call out. Secondly, since these calls are now synchronous, you should place your cross-profile call and printing of results inside the connection listener.
When you run the code listed under ''make a cross-profile cal'' you should see two logs for ''Hello World'', one from each profile. If you only get one log, make sure you've installed your app in both profiles and have granted the permission.